
DoubleTake
for macOS
Sample images
Take a look at the sample images and download them (5 MB) before you read this manual.Start DoubleTake
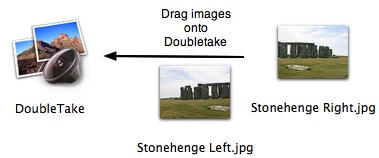
To stitch two or more images seamlessly together, wide or high panorama, drag them onto DoubleTake. This will also work when DoubleTake is in the Dock, or if you drag from iPhoto, Apple Aperture (tips, plug-in), Adobe Lightroom or Adobe Bridge.
When DoubleTake opens the images, it analyzes their edges and makes an initial guess about the arrangement—left, right, top, or bottom. If the guess is incorrect, you can easily drag the images into the correct order. You might also click the zoom-out button for a better overview.
DoubleTake’s automatic alignment assumes the images overlap by 5 to 50%. If the overlap is outside this range, you will need to arrange the images manually.
If you drag all the images you wish to join at once you get the automatic guess. If you drag one image at a time it gets dropped where you release the mouse.
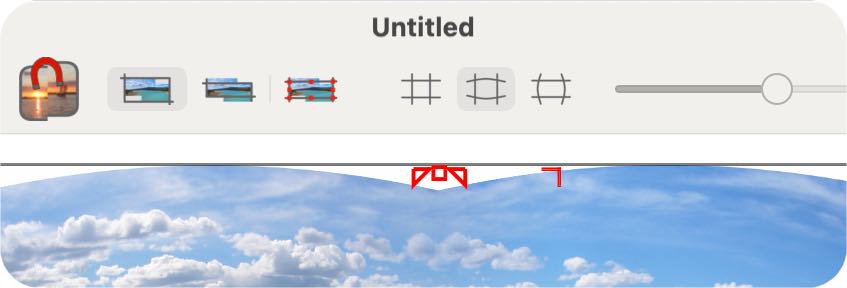
Adjusting the seam
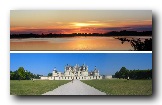
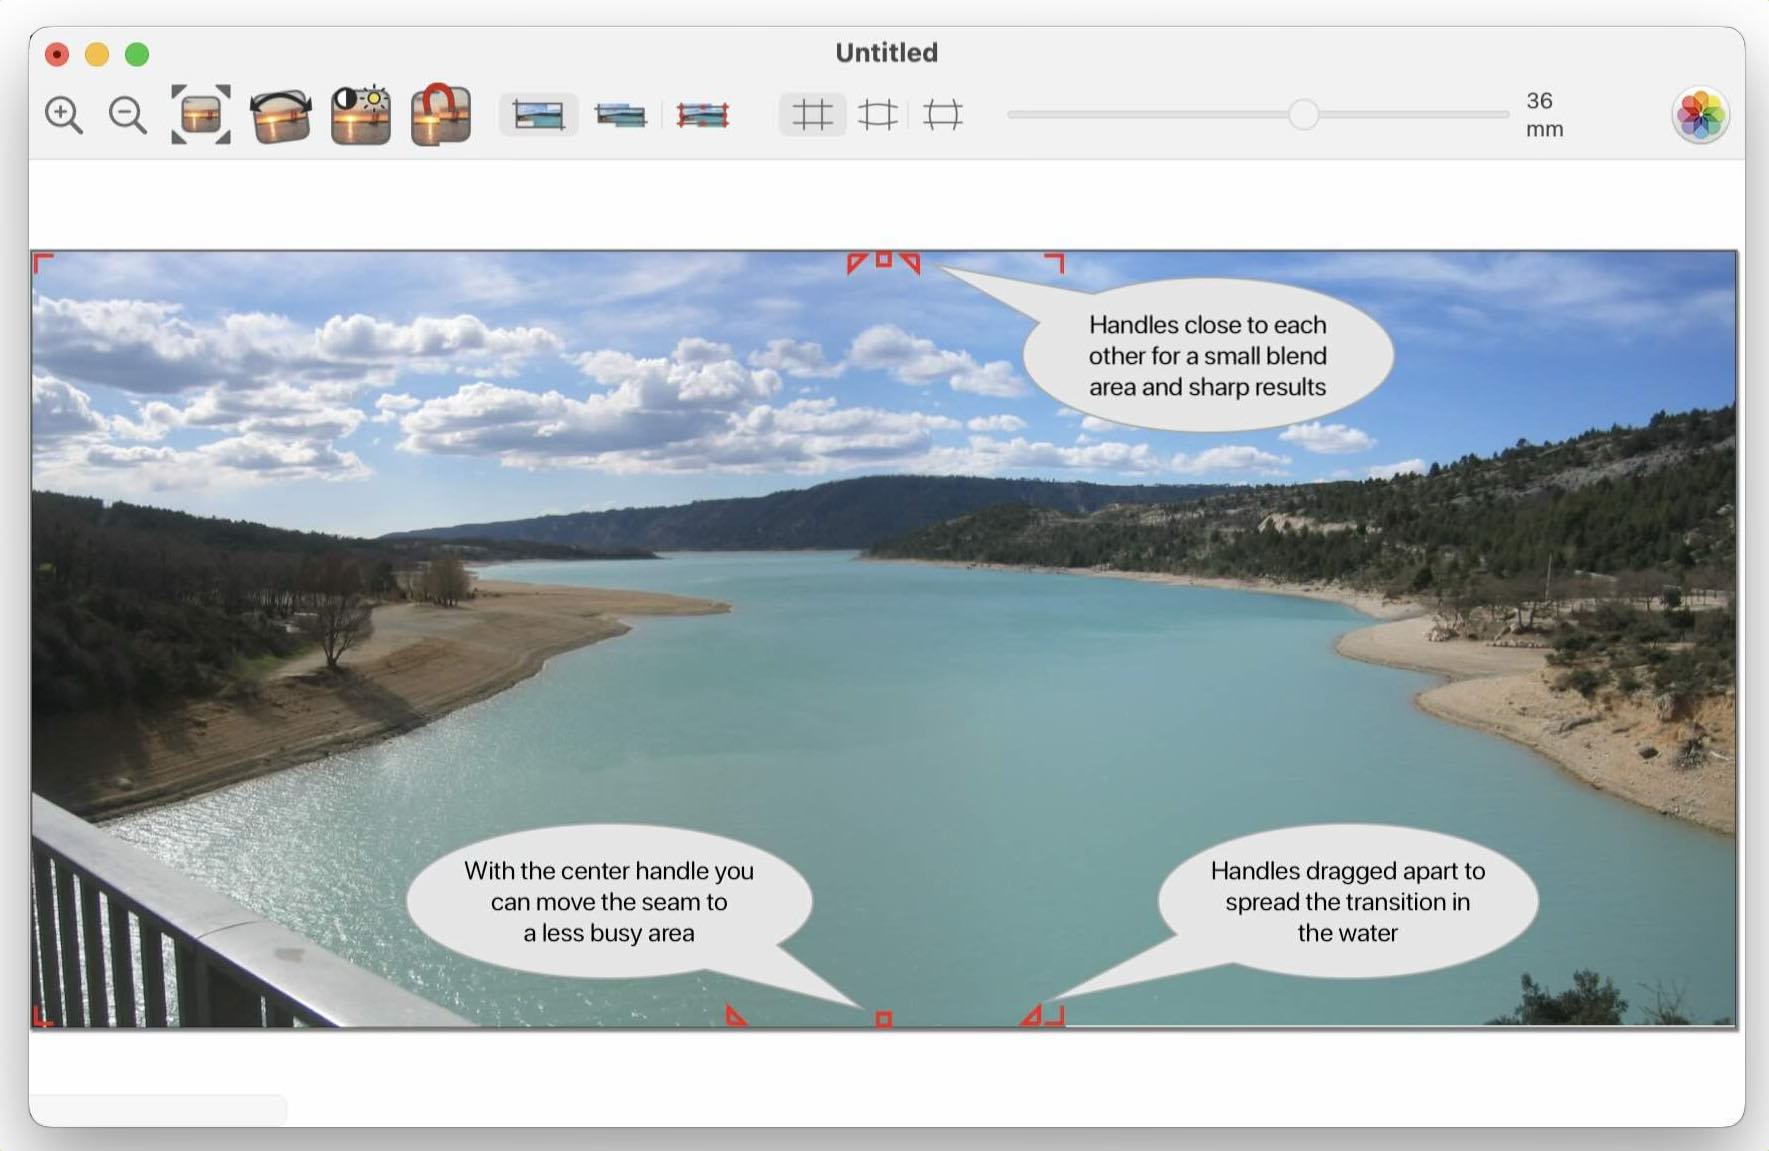
On this screenshot you can vaguely see a color-shift in the water because of the seam. To make a wider seam and spread out the color change do these 2 steps:
- Click on the seam to make the overlap handles appear.
- Drag one of the triangular handles, until the transition is smooth.
Align
Once you have sorted the images, you can automatically adjust the overlap instead of manually positioning the images with the mouse or keyboard. Click on the overlap to select it, then click the align button. If the alignment fails, you can use undo.Keyboard Shortcuts
Without other keys held down: + and - zooms in and out.
Space held down while dragging anywhere in the window, scrolls everything.
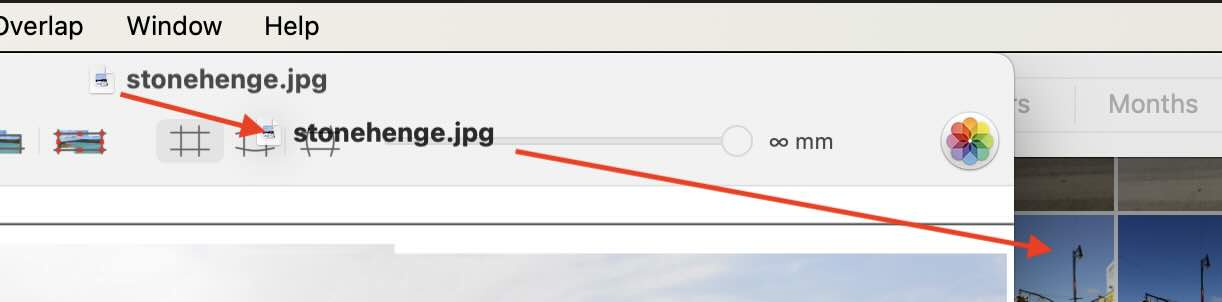
Locking Overlaps
When you wish to stitch together many images, it is convenient to be able to lock a overlap when it has been aligned. This is the purpose of the overlap menu.
Images locked at the overlaps will move together with the mouse.
If you select more than one image by clicking on it while holding down the shift key, you can also move the images together.
Move and Align
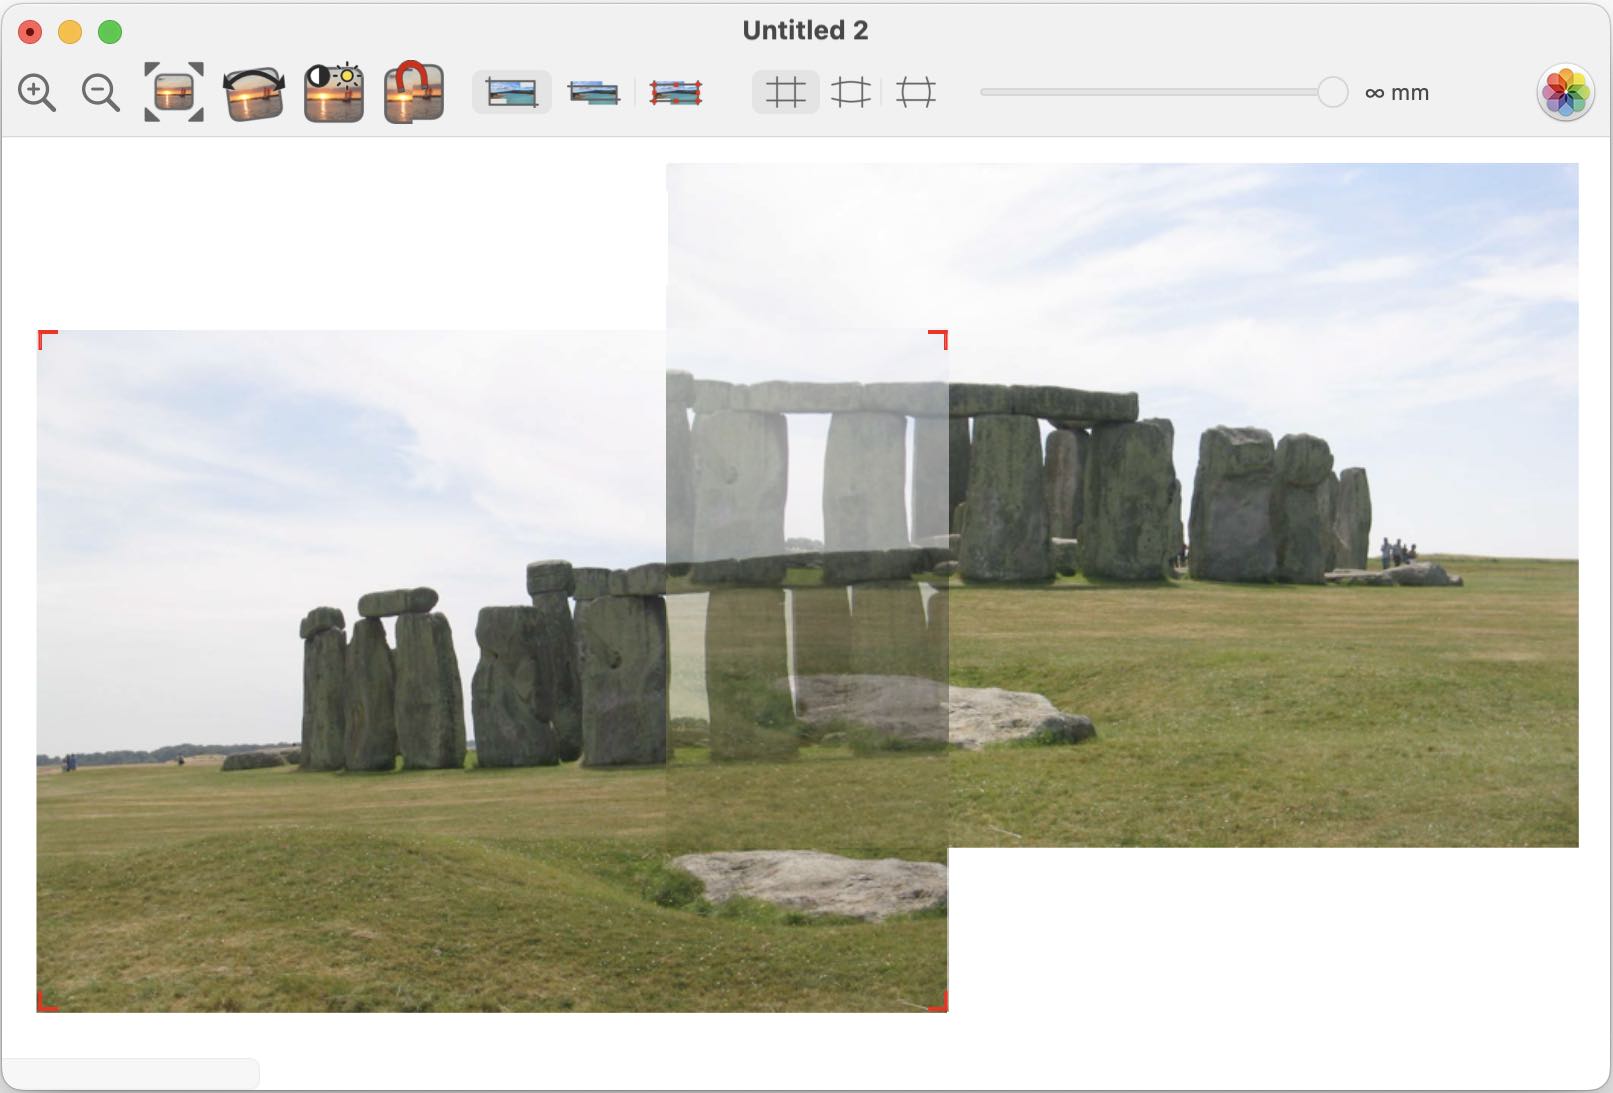
When you drag the images the overlap is shown with transparent images.
This allows you to align the edges in the images, and better decide if you want to move the seam away from the middle of the overlap. A diagonal seam can be useful in some cases.
Undo is supported to undo unintended move(s).
Keyboard Shortcuts
Single click on one image selects it (shown with small red handles). Then it can be moved with arrow keys, and deleted with backspace.
When It Looks Just Right
You save the finished image, and perhaps you drag the saved result to your app oc choice, or use the button for exporting to Apple Photos
Crop, Fisheye & Focal length
Crop
DoubleTake offers three ways of cropping of the result.
- Outside crop: will include everything including areas outside the interesting parts
- Inside crop: will exclude the parts of the stitched image which stick outside
- Manual crop: you drag the red crop handles until you have chosen the interesting parts .
The parts which will be cropped away when saving, will be shown dimmed outside the crop rectangle.
When you have decided how your image should be cropped and made your adjustments, save to a file format which suits your needs.
Fisheye
Let you apply fisheye style distortion to the image. Good if the image has straight lines across the seam area close to the edges of the image. You can turn this feature off, with horizontal lines bent or with vertical lines bent.
Focal Length
This is only used for the fisheye distortion. The shorter the focal length used when the picture was taken the more distortion. You can adjust the slider and ignore what the camera may have written into the image file when the image was taken. Then you can use the manual override, to tell DoubleTake at which focal length the images were taken.
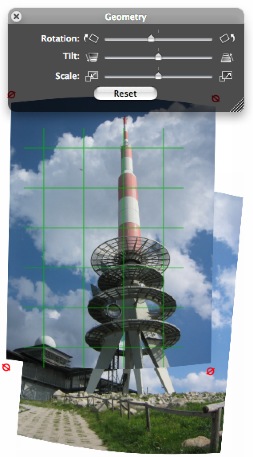
Geometry Tools
Each image can be rotated or adjusted individually. The palettes for geometry and color adjustments work on the selected image or images. If you select another image, the palette will update to display the setting for that image.You select more images by holding down the shift key while clicking on it.
Scale, Rotate and Perspective.
The corner handles on the selected image change to show how the image gets changes when you drag the corners.
Rotate around a center you choose.
Normally DoubleTake rotates images around their center. Many times it is simpler to align 2 images to each other if you rotate them around a easy to pick point in the overlap. Bring up the Geometry panel, and double click on the point you wish to rotate around. It gets marked with a red circle. The selected images gets rotated by the sliders. You can move the center to another point by double clicking the next place. A 30 sec video may show this better.
Keyboard shortcuts
You can change the function of the corner handles by hitting:- r - for rotate
- s - for scale
- p - for perspective
- n - for normal movement
m - Align an overlap or an image. (originally I called this magnetize)
Magic Mouse and Trackpad
If you have a Magic Mouse or Trackpad you can use a few extra shortcuts there.- swipe with 3 fingers (2 on the mouse) will scroll to and select the next image
- pinch with 2 fingers allow you to zoom in and out
- rotate will rotate the selected image(s)
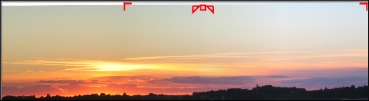
Adjustment Tools
The two images here are exposed differently because the sun is only in the left image. On most cameras you can turn auto-exposure off, but you can also tweak this afterwards.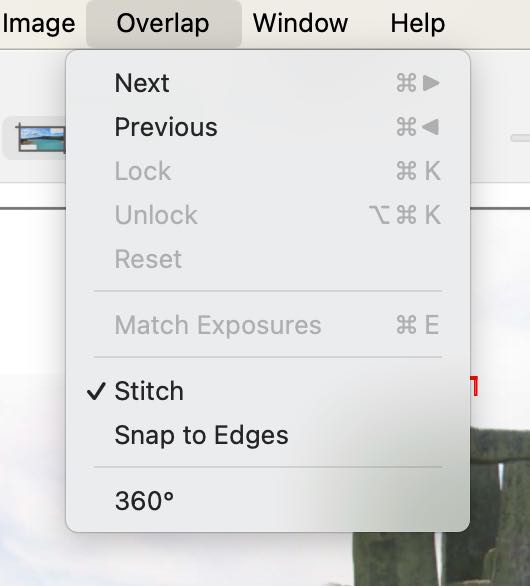
Many Images
When you drop many images into DoubleTake, Zoom to fit will make the overlaps rather small. If you then zoom in to see each overlap clearly you can jump to the next overlap with the Next and Previous menu (and their shortcuts).
The lock and unlock function can be used when you have adjusted an overlap, and you don't want to move the images apart by accident. The 2 images now select and deselect together, and they move together when you drag with the mouse.
Reset is only if you have adjusted the seam width or dragged the seam away from the center of the overlap.
Keyboard Shortcut
Extend selection: If you have selected an image in the middle of a panorama you can select all images to the left or right by using cmd-shift-right/left-arrow.
DoubleTake File Format (.doubletake)
If you have arranged many images, you may save the arrangement and settings as well as saving the completed image. This is good if you want to make a change later. Then you don't have to layout all the images again.
The format does not save copies of the images, but just their location on your disk. If you move the images, then you should put the DoubleTake file the same place, so it can find them.
If you move the images back, or into the same folder as the .doubletake file, you can open it again, edit the layout, make adjustments and save as a regular image format again.
While I don't intend to document the internals of the format (XML) you are welcome to take a look inside with Text Edit!
An other reason to save these files is if DoubleTake gets new features, then it is easy to open old image sets.
DoubleTake File Format - The Library
When you save a merged image as a normal image format, DoubleTake saves the settings in its own folder which you set up in the preferences. You can then go back into this folder later and open the arrangements later, if you have not moved the original images.
QuickTime VR
You can save any stitched image as QuickTime VR with DoubleTake 2.2.8. Apple has deprecated QTVR and DoubleTake 2.2.9 and newer does not offer saving as QTVR. I could consider saving as HTML as a new feature, but few these days have web sites, and regular video is Youtube or Vimeo compatible and I feel that is how it is mostly done.
To stitch 360 degree seams, you pick the 360 degree menu item in the overlap menu. This duplicates the left image to the right so you can arrange the seam on the "back side". You can move the duplicated image to line everything up, and when you release the mouse all the images gets rotated together if your horizon is not perfectly level.
The save sheet gives you a few options to generate HTML code for embedding QuickTime VR in web pages. You can either use the html which gets placed on the clipboard, or use the full screen QuickTime VR html setup saved together with the movie.
If you resize DoubleTakes window, zoom and scroll to a view on the panorama, this setting will be stored as the default opening of the QuickTime VR movie.
Here is a one minute movie showing how to make a 360 degree qtvr out of 3 photos (whicha are not really 360 degrees).
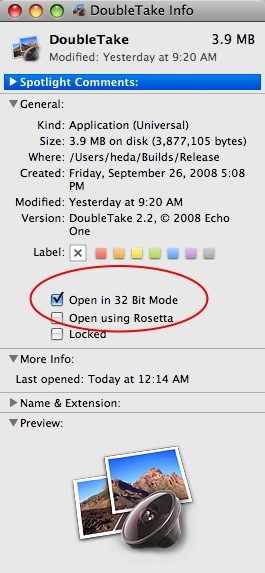
Notice that since Apple does not support QuickTime VR in 64 bit mode you will need to switch DoubleTake to 32 bit mode to save as QTVR on Mac OS 10.5 and newer.
Photomontages
You can use DoubleTake as a quick way to create photomontages. Take a look at the video to see a demonstration.Large Images
 With DoubleTake you can create
images which are
very large. If you stitch 16 photos from a 12 mega-pixel camera, the final image can end up having more than 100
million pixels.
With DoubleTake you can create
images which are
very large. If you stitch 16 photos from a 12 mega-pixel camera, the final image can end up having more than 100
million pixels.
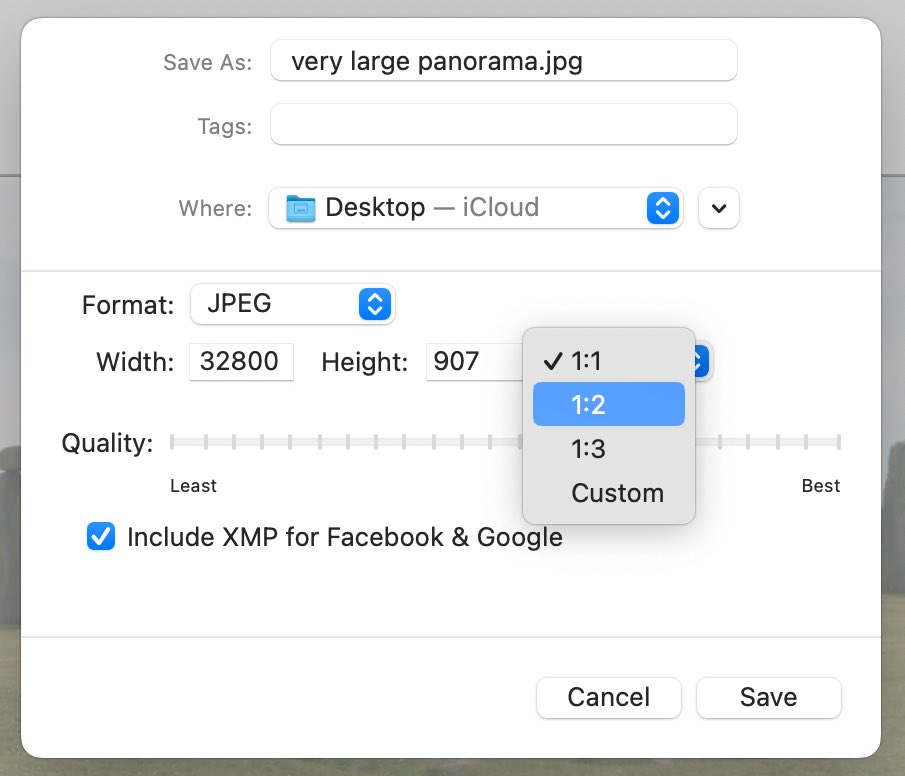
Many applications can not handle images this big gracefully, or become overloaded. Adobe's PhotoShop Elements has a limit of 30,000 pixels wide or high images.
A 30,000 pixel wide panorama will take a long time to open in Preview on most Macs (20 minutes on my PowerBook with 1GB of RAM), so I recommend using the "1:2" or "1:3" scaling to get an image less than 15,000 pixels wide.
The "Custom" scaling makes it possible save the panorama in any smaller size and it will keep the proportions intact. If you type in 1.000 pixels in the height field, the width field is automatically set so that the hight:width proportions will remain the same.

Limitations
DoubleTake panoramas are limited to 256 million pixels, however practical limits are lower as images this large are too big for most computers to work with.
64 Bit vs. 32 Bit (legacy)
To save panoramas larger than 100 million pixels you need a Mac with an Intel Core 2 Duo processor or newer and Mac OS X 10.5. The upper limit of saved files is not known - but I believe this is limited by patience, file format limits and the application in which you wish to use the saved image.
When running 64 bit QuickTime VR is not supported as Apple decided not to add this to the 64 bit part of QuickTime. Neither is stitching of QuickTime movies (not many have ever tried this).
To turn on 64 bit mode use Get Info in Finder and uncheck the 32 bit checkbox
To turn off 64 bit mode use Get Info in Finder and check the 32 bit checkbox
Contact
Feedback, report bugs and questions are welcome to:Henrik Dalgaard
Echo One
feedback@echoone.com
My time zone: Central European - I live in Denmark.